How to Make Healthy Meals for Less Than $1 Per Person
In our home, a chicken isn’t meant for just one day—it feeds us for most of the week.
Cooking this way is not complicated. It simply requires thinking about food a little differently.
One of the benefits of having lived several decades is having experienced difficult times and learning how to manage through them. For me, that included years when I had to make a pound of ground beef, a box of elbow macaroni, and a jar of spaghetti sauce feed my young family of five for several days.
These days, my husband still brings home a paycheck, but I try to run our household on my Social Security income. If I can manage it now, I know we’ll be able to manage when retirement finally comes.
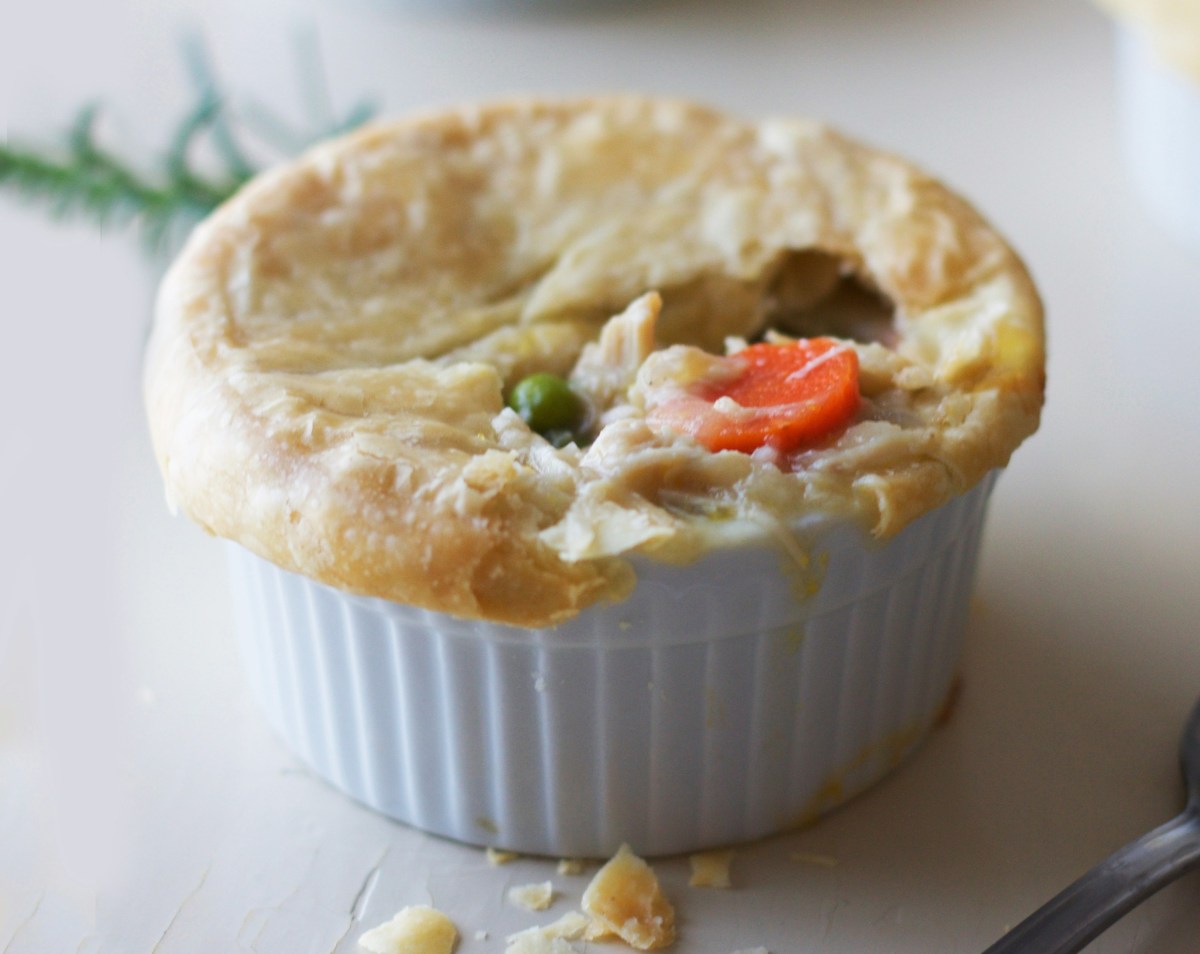
In our home, a chicken isn’t meant for just one day—it feeds us for most of the week. One bird becomes soup, stew with dumplings, pot pie, open-faced chicken sandwiches with mashed potatoes and gravy, and chicken salad sandwiches.
When choosing what foods to cook, the first step is selecting ingredients that can be used in multiple ways while offering the best value for the money.
A good example is chicken.
The least expensive way to buy chicken is usually as a whole bird. Compare the price per pound of a whole chicken to the price of individual cuts. Chicken breasts, wings, thighs, and legs are convenient, but they are typically more expensive per pound and usually provide only a single meal from each portion.
A whole chicken, however, gives you options.
If you prefer individual cuts, you can cut the chicken apart yourself. After removing the pieces you want to cook first, the remaining bones and scraps can be boiled to create quarts of rich chicken broth that can be used later for soups, stews, gravies, and sauces.
To get the most from the chicken, place the whole bird in a large stock pot and cover it with water. Simmer it gently until the meat begins to fall from the bones. Remove the meat and set it aside.
Continue simmering the bones to draw out the remaining flavor and nutrients. Once finished, strain the broth and discard the bones, skins and other bits.
Pick the cooked chicken meat apart and divide it into portions. These can be stored in the refrigerator for several days or placed into freezer bags—one portion per future meal.
Now you have the foundation for several meals.
The broth
Allow the broth to cool overnight in the refrigerator. By morning, a layer of yellow fat will have formed on the surface; skim this off and save it. Beneath it you will find the broth has thickened into a soft jelly, which is a natural result of the collagen drawn from the bones during cooking. This rendered chicken fat can be used in place of butter or oil when sautéing vegetables or frying potatoes.
The remaining broth can be used to make a large pot of soup, or reserved for other meals such as chicken pot pie or open-faced chicken sandwiches served with chicken gravy, mashed potatoes, and a green vegetable.
Vegetables to keep on hand
A few inexpensive vegetables will stretch these meals even further.
Celery will keep surprisingly well if the bunch is wrapped in a damp cloth or paper towel and stored in a plastic bag in the refrigerator (an empty bread bag works perfectly).
Keep several yellow onions, a bag of carrots, and a few russet potatoes on hand. Whether purchased individually or in a five-pound bag, potatoes are filling and inexpensive.
Frozen vegetables such as green beans or broccoli are also useful to keep in the freezer. They are often more nutritious than canned vegetables and, in many cases, more economical as well.
With these simple ingredients on hand, one chicken can easily become several satisfying meals spread across most of the week.
Estimated Shopping Cost
(Prices based on current Walmart pricing)
Vegetables
- Yellow onions – 3 lb bag: $2.97
- Carrots – 2 lb bag: $2.62
- Celery – 1 bunch: $1.88
Potatoes
- Russet potatoes – 5 lb bag: $2.47
(approximately 49¢ per pound) or
- Russet potatoes – individual: about $0.75 each
(about 88¢ per pound depending on size)
Chicken Options
Whole raw chicken
Average price: $9.48
Approximately $1.64 per pound
Boneless chicken breasts
Average package price: $11.88
Approximately $2.57 per pound
Note: Choosing boneless chicken breasts eliminates the opportunity to make bone broth. Soup can still be made using the meat alone, but the number of meals—and their overall quality—will be reduced. The bones are what create the rich broth that stretches a single chicken into several nourishing meals.
Store-roasted rotisserie chicken
Average weight: about 2.25 lb
Price: $5.97
Approximately 16.6¢ per ounce
Because the chicken is already cooked, a store-roasted chicken can sometimes be the most economical option, saving both cooking time and energy while still providing meat and bones for broth.
Estimated Total Meal Cost
Using boneless chicken breasts
Total estimated cost: $21.82
Cost per meal (five meals): about $4.36
Note: Choosing boneless chicken breasts eliminates the opportunity to make bone broth. Soup can still be made using the meat alone, but the number of meals—and their overall quality—will be reduced. The bones are what create the rich broth that stretches a single chicken into several nourishing meals.
Using a whole raw chicken
Total estimated cost: $19.42
Cost per meal (five meals): about $3.88
Using a store-roasted rotisserie chicken
Total estimated cost: $15.91
Cost per meal (five meals): about $3.18
Bottom Line
Using a store-roasted chicken, the total grocery cost is about $15.91. If these ingredients provide five meals, the cost of each day’s meal is about $3.18.
For two people, that works out to about $1.59 per person.
For a family of five, the cost drops to about 64 cents per person.
Prices vary by store, region, and season, but the principle remains the same: choosing whole ingredients and using every part of them can stretch a small food budget surprisingly far.
What This Provides
With these ingredients, it is possible to prepare one filling, nutritious meal per day for three or more days, and often up to five meals depending on how the chicken and broth are used.
Choosing the whole chicken not only reduces the cost but also provides bones for making broth, which stretches the meals even further.
Prices vary by store, region and season, but the principle remains the same: choosing whole ingredients and using every part of them can stretch a small food budget surprisingly far.
In the end, making ends meet isn’t about fancy recipes—it’s about using what you have wisely and wasting nothing.