the beautiful western Allegheny mountains of Pennsylvania.
Our new homestead is located in a lovely small, rural town nestled in the beautiful mountains in Pennsylvania.
As we settle into our 95-year-old brick home, we will be busy renovating its original interior style. We will also learn the best ways to raise our food in this new growing zone. Deer try their best to interfere with a gardener’s plans.
Raising our food is now more challenging because we have such limited space. Still, our first container garden last summer shows potential. We grew an ample crop of yellow was beans, tomatoes, cabbage, butternut squash, strawberries, herbs, and more.
I invite you to follow along. We are turning our new homestead into our forever home. We will explore our new environment. We will raise and preserve foods for our pantry. We also plan to expand our horizon.
Along the way I hope you enjoy the journey with us.
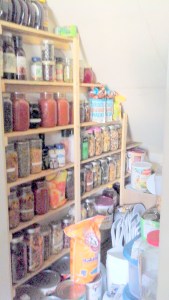
At one time I had no basement or garage, but I did have a closet located beneath a stairway. With very limited wall spade I built shelves the depth and height of a 64 ounce mason jar. I built these on facing walls. At the back of the closet, I added one deeper shelf across the lowest height of the area. This is where I stored canning supplies. It was crowded but worked. I used 1″x 4″ lumber for the shelves. For the vertical and horizontal supports for each shelf, I used 1″ x 1″ lengths.
This pantry area was located in the tiny room next to the pantry beneath the stairway. I built it using 2″ x 3″ lumber for both the vertical frame and horizontal shelf supports. I used the mason jar cases as measurement for the depth of the shelves. Sunlight found its way through the window and curtains. To help protect from the light, I attached sheets of toweling to the shelf front. Large pots and other canning supplies were kept below, and empty jars on the top shelf.
In another home I used an empty room for my food storage. Optimizing bookcases for food storage.
Bookcases, wire shelving, shelves mounted to walls, stacked crates, old cabinets. Anything can be used as low cost storage for your food supply.
A bedroom closet with wire shelving also serves as pantry storage space. We added a few more shelves inside the guest room closet at my in-laws condo.
A basement that remains cool and dry provides adequate space for a large pantry. Use metal shelving, build basic wooden shelves, or even use old kitchen cabinets leftover from someone’s kitchen renovation.
There is no are too small or too large for creating your food storage pantry. We are limited only by our imagination.
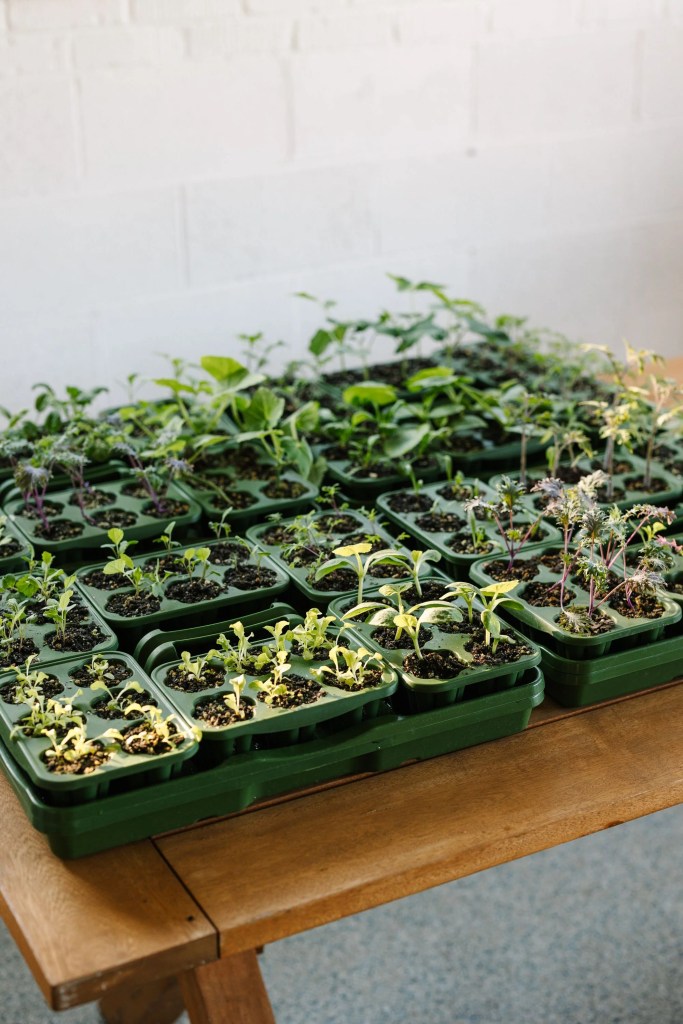
With the new year it is time to plan the springtime garden, This year Greenstalk has something new for seed-starting. I have thought about it a lot. I have decided to replace my common, tiny seed starter trays with these being offered by Greenstalk.
More information coming once I have the trays and prepare them for planting.
These are some of my favorite books. I am sharing my reading list, not selling books. If you are interested in your own copy, find the book title. Then, copy and paste it into the address bar of your browser.
The Lost Art of Reading Nature’s Signs: Use Outdoor Clues to Find Your Way, Predict the Weather, Locate Water, Track Animals – and Other Forgotten Skills (Natural Navigation)
This is a fun little book to change the way you see your environment.
Tasting History: Explore the Past through 4,000 Years of Recipes (A Cookbook)
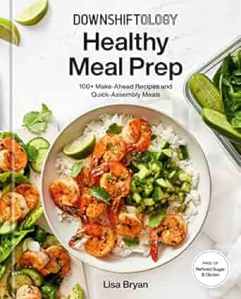
Downshiftology Healthy Meal Prep: 100+ Make-Ahead Recipes and Quick-Assembly Meals: A Gluten-Free Cookbook
With rising food prices, everything else will soon skyrocket. It is imperative that we prepare for the worst while hoping for the best.
We are creating a food pantry in our basement. We have been storing our preserved foods there. We also store bulk foods in pails and all the other miscellaneous products we use throughout the year.
Our basement grocery store includes home canned foods from our garden or those purchased from local farms. It also has canned goods of foods we can’t raise like salmon. A supply of freeze-dried foods completes the list of stored foods.
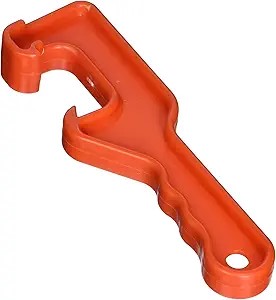
In large food safe buckets we store bulk items. Rice, beans, grains, pasta which will last years when properly stored. For long term I use large Mylar bags with oxygen absorbents inside the buckets. Do not forget to have several bucket openers handy. These inexpensive tools make re-opening the buckets much easier. When I fill a bucket with Mylar bags containing ready-to-eat meals, I attach one of these tools to the lid. These are ready for long road trips, camping or emergencies.
Do not forget essentials but less thought of items like baking soda, baking powder, lard, spices, etc. Other essentials like toilet paper and other one time use products; foil, paper towels, matches, cleaning products, etc.
When creating your food storage pantry, place the newest foods at the back of the shelf. Use the oldest ones first. Keep an inventory of your foods listing the food, date stored, as well as when removed for use. Also make note of foods you want to refill as well as those you will never preserve again.
Start with one room at a time, working from top to bottom. Dust, wash windows, vacuum or shampoo carpets, clean under furniture, empty cupboards, wipe down appliances, and launder curtains. Repeat this process seasonally.
When I was a child keeping a home followed a schedule and a set plan. Grandma always kept to a schedule. Even with six children, her home was always spotlessly clean. You could set a clock by meal time.
Laundry on Monday, Ironing on Tuesday, etc.Once monthly she would wash, iron and change the kitchen curtains. Seasonally she would do a deep cleaning, also called Spring cleaning. It’s funny when it came time to deep cleaning every season was “Spring”.
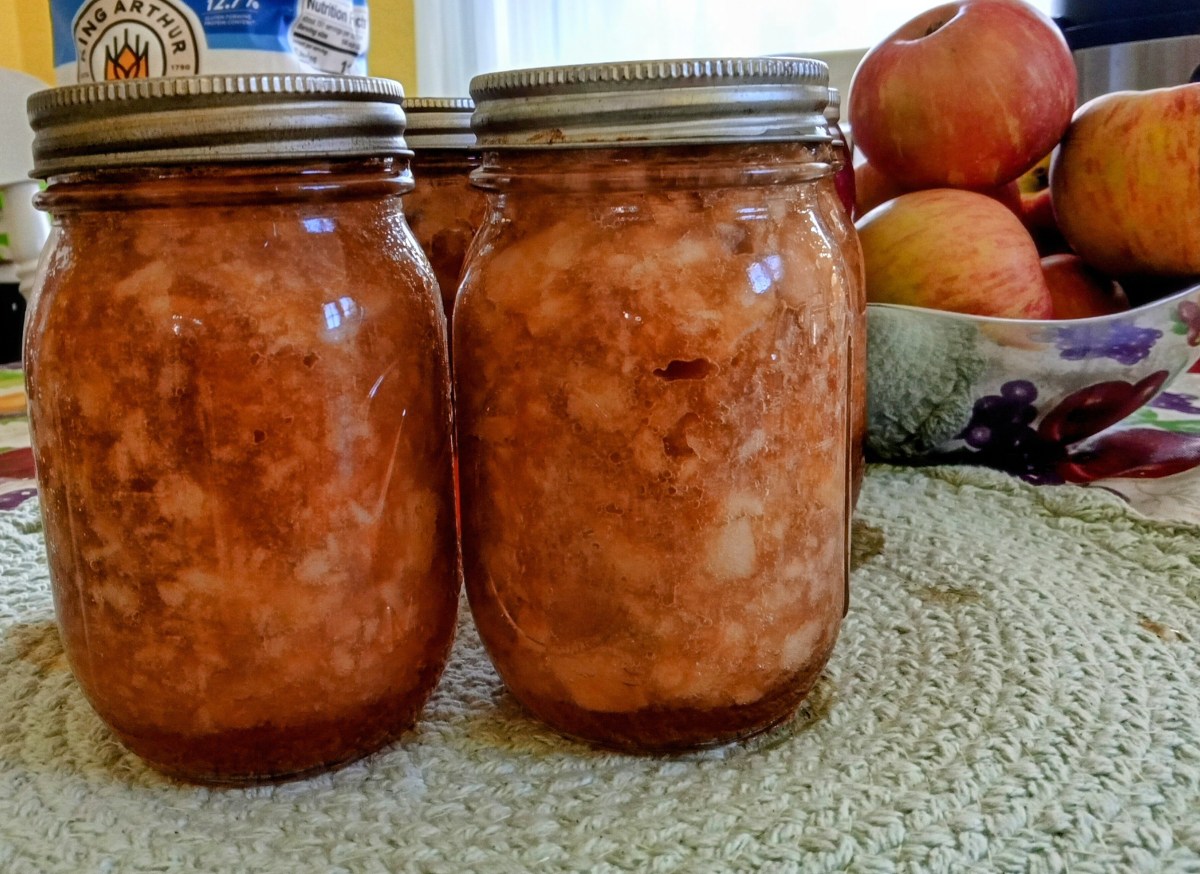
We traveled to a remote Fruit Stand earlier this week where we purchased a half-bushel of Cortland apples, my favorite for baking, dehydrated and applesauce.
Yesterday evening I pared all but enough for fritters and a pie, then I roughly chopped the apples into large pieces, put them into a slow cooker with about a cup of apple cider (liquid to keep the apples from sticking to the pot). I set the temperature on low while I was peeling the apples, adding each to the pot until I had the amount I needed.
Next, I lowered the temperature to WARM, put the lid on and went to bed.
This morning the applesauce was perfect! I cooked down very slowly and there were some chunks which was just the way I like it.
I added nothing except the small amount of organic cider. The applesauce were naturally perfectly sweet.
Next pour the applesauce into hot pint jars, wipe the rims and add the lids. Process 20 minutes, pints/quarts, in a boiling water bath.
The tiny garden has been productive and has given us a pathway for planning next year’s garden. Unlike at our Virginia farm our new homestead has plenty of pollinators for our garden, and surprisingly the deer stayed away all summer.
Two of the garden towers planted with yellow wax beans has produced all we need plus a supply of seeds for next year.
We planted six pasta tomato plants in grow bags and they produced enough fruit to share with the neighbors, enjoy some with our meals, and still pressure can 12 pints for pasta sauce.
We harvested sweet potatoes, butternut squash, yellow summer squash and zucchini, five nice heads of cabbage, red, yellow and orange peppers, peas, strawberries, blackberries and assorted herbs.
We have a very small yard. We have a good sized deck where we placed 7 garden towers, 9 or 10 grow bags, and a few five-gallon buckets. Down in the back yard, an area of only approximately 12 x 20 sf, I set three 13 gallon growbags for 9 sweet potato plants and three 5-gallon buckets for three butternut squash vines.
We will spend a portion of the winter months planning and designing the new springtime garden.
Sometimes garden space is limited, or we just need a way to keep our plants nearby and easy to access. In my case I also needed a way to reduce all my bending.
I am planning a deck garden for next year. It will consist of garden towers and other containers along will trellis’ for supporting vining plants.
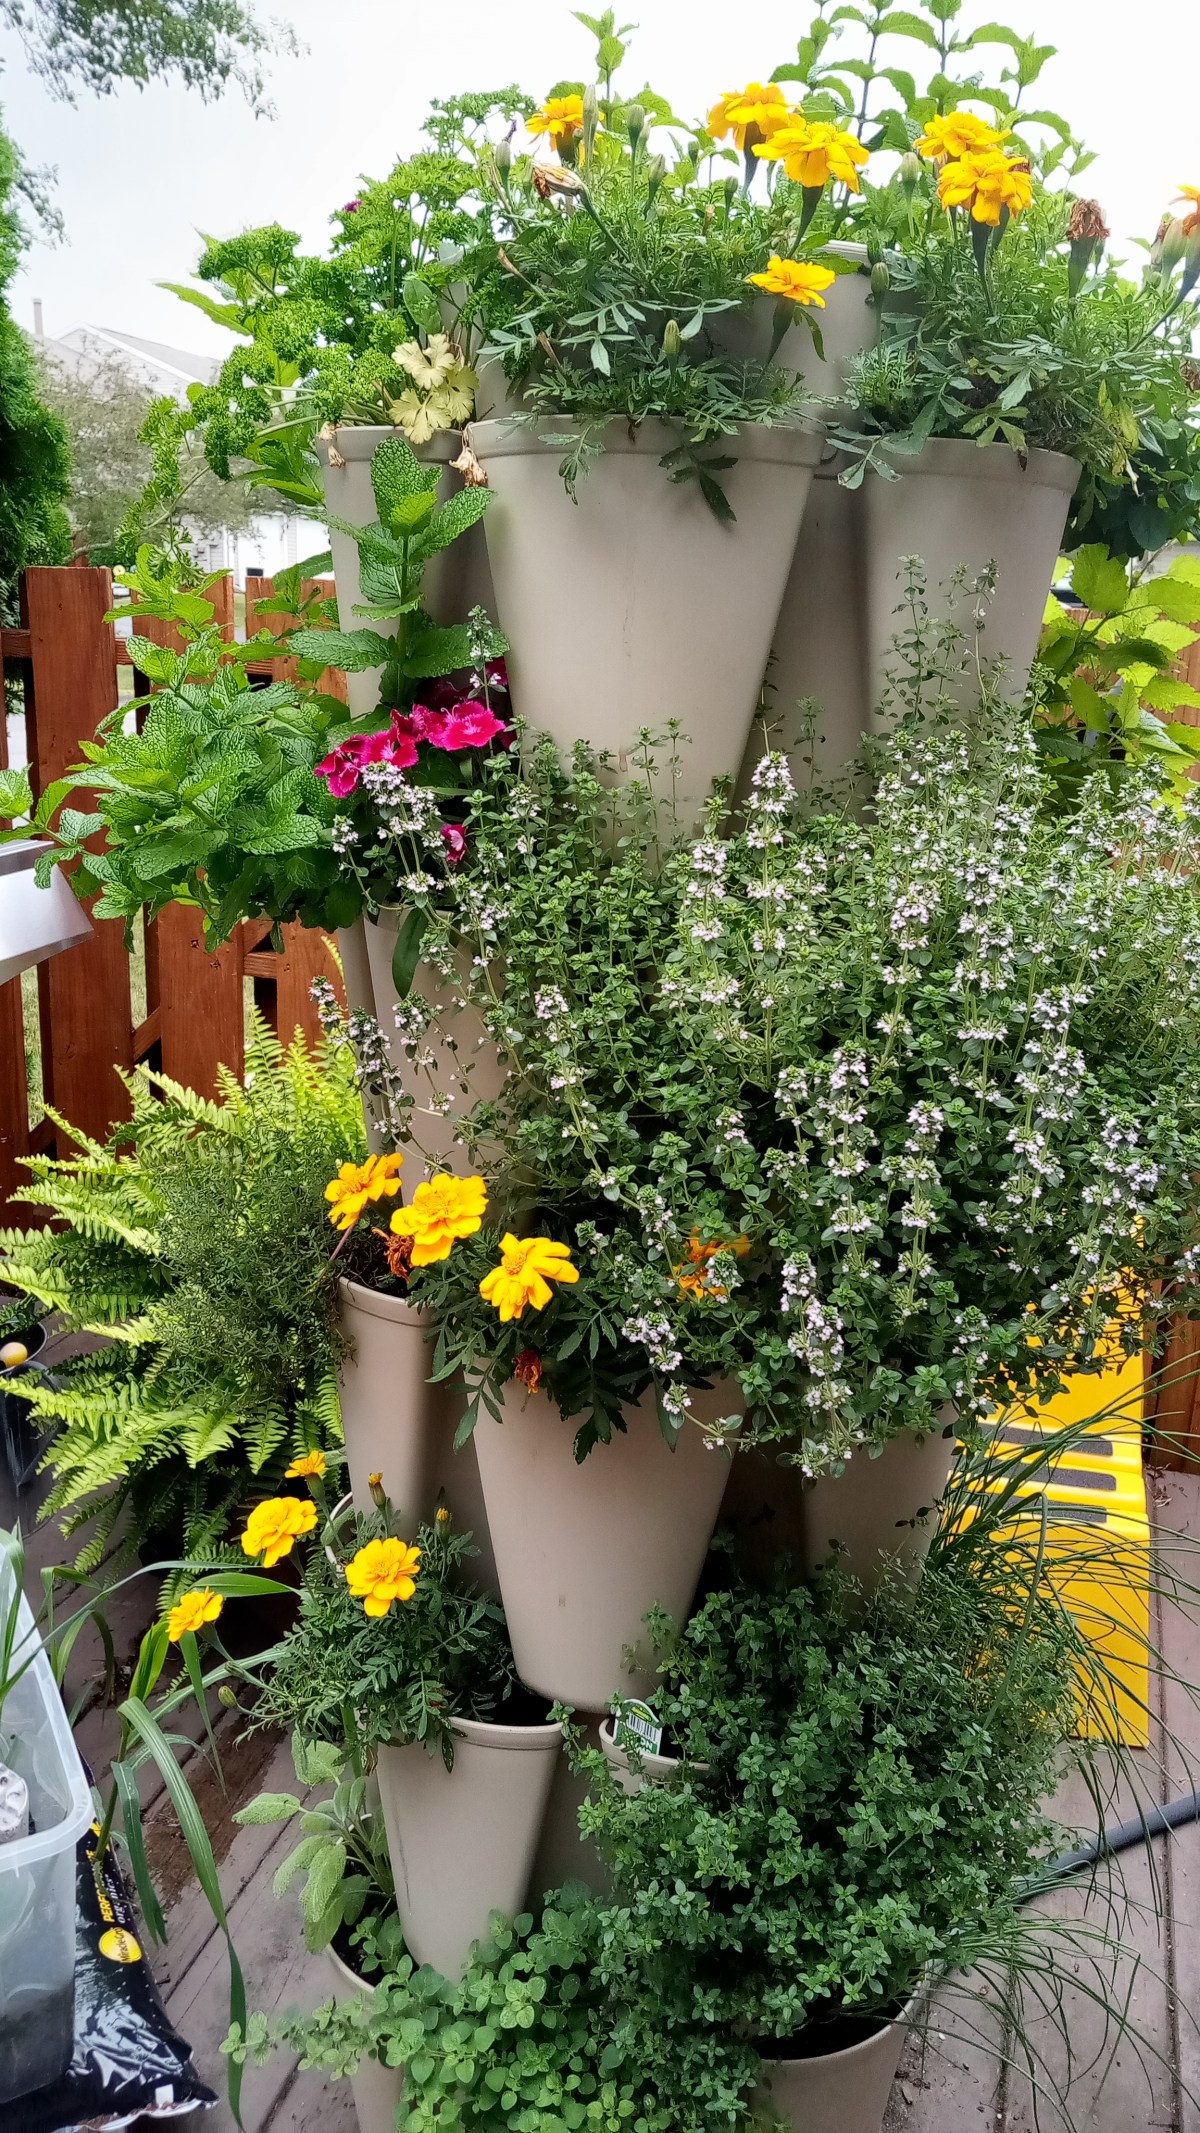
Last spring I purchased a Garden tower and planted herbs and flowers all within easy reach and no wear and tear on my knees and back. It worked great! So well in fact that at the end of the season I bought two additional towers as well as the automatic watering system for them.
Each tower has 35 planting areas. At the top of the tower is a 5 gallon self watering container. It self water from the top down and even on the hottest days I needed to fill it only once daily.
The automatic watering system, which I will connect next spring, will be scheduled to refill the water when we are away.
Next planting season I will plant vegetables in the additional towers.
Until then I will collect the newest seed catalogs and begin planning this new small garden.
It is already the end of the 2020 growing season, at least for many of us in the northern hemisphere, and I am planning what to grow in my 2021 garden.
There are the basic vegetables which we consume most often, green and yellow beans, carrots, beets, leafy greens, etc. (I highly recommend the carrot variety “Hercules” which grow large, sweet and don’t turn to mush when pressure canned) Then there are the few “new” veggies that I will plant in hopes we will discover a new favorite.
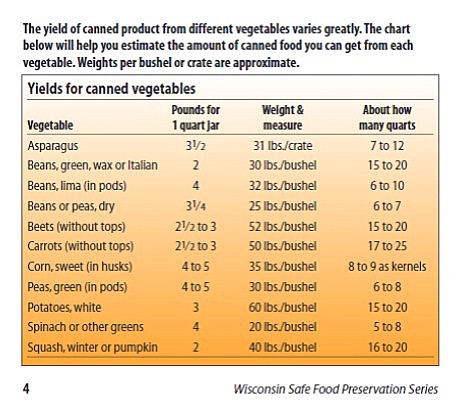
Something I have found to be a very useful tool in planning the garden is this canning chart from the University of Wisconsin-Madison’s pdf for canning vegetables.
canning yield chart
The chart lists how many pounds of each particular vegetable is required to fill a bushel, as well as pounds to fill a quart canning jar and the number of quart jars which can be filled from one bushel of veg.
These help me to plan quantities needed for my pantry and in the end, how much I need to plant so I don’t sow too many or too few seeds.
It is also helpful when going to the farmer’s market to purchase what isn’t in my garden. It helps when the farm stand doesn’t sell “by the bushel” and only by the pound.
I hope this .pdf for safely canning vegetables and this chart will be of use to you. If you are new to canning I highly recommend downloading the .pdf and reading it thoroughly.
It may seem a bit late in the year to writing about our new garden, but it is the best time to tell you about it and share the ups and downs, and the results of our efforts to grow our own food in 2020 here on the homestead.
We have been on the homestead for four years and have failed at our attempts to start a garden on the very poor ground. The clay muck has been difficult to learn how to make the best of it.
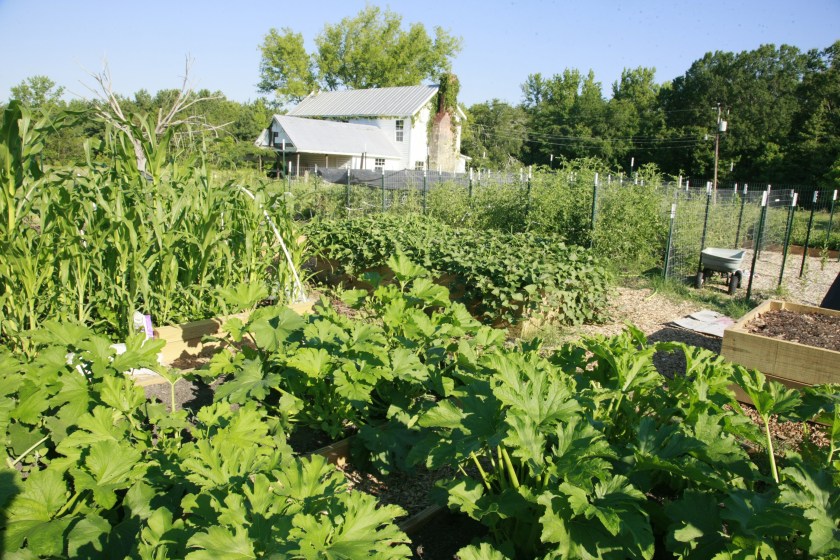
We began our work in February as soon as it was warm enough to work outdoors. We decided on the size and location and set to work putting up a fence both to keep deer and other critters out, and to help keep us with design and size of the garden.
Our new garden June 2020 75′ x 100′
We next covered the entire area with cardboard topped with a 12″ layer of wood chips. The cardboard is used to block the light from reaching the weeds, and the thick mulch layer helps to kill the weeds and elevates the raised beds so they are well above the wet clay.
Following a heavy rainfall we can feel the wetness beneath the mulch as we walk, but the raised beds are not being drowned by it.
Gardening in the South has definitely been a learning curve. Trying to grow tomatoes with a shade cover is a complete waste of time and effort. The hot temperatures and strong sunlight is not beneficial to tomatoes and the fall planting seems to be doing much better now with the cooler temperatures.
On the other hand, summer squash, peppers, cucumbers, and greens did well. As did my first ever sweet potato crop and strawberry plants.
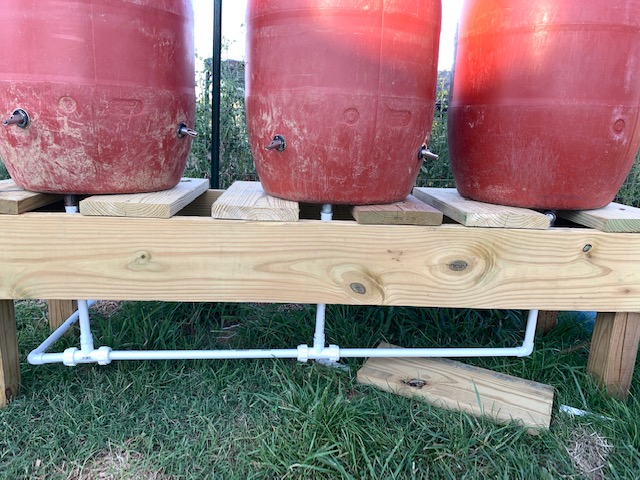
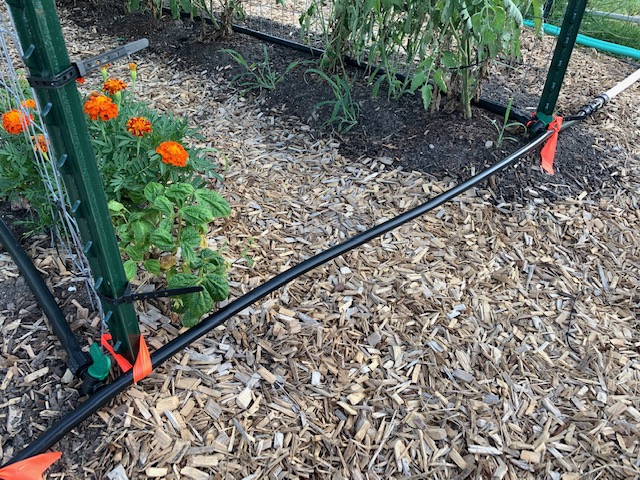
water barrels with manifold
water from manifold to drip mainline
irrigation mainline and drip lines
Because there is no running water on the homestead we needed to get creative. Nick constructed a stand to support and elevate water barrels high enough to produce a good gravity fed water flow to the irrigation drip tapes.
Some plants succumbed to insects or excessive heat, but I was able to harvest enough food to fill a few hundred canning jars. Harvest included over 400 pounds of cucumbers, zucchini, yellow summer squash, spinach, chard, peppers, sweet potatoes, carrots, beets, and rutabaga.
Currently green beans are now growing well, as well as a fall planting of tomatoes.
This first garden has also been costly because we needed to buy mulch and garden soil (we mixed equal parts of potting mix, peat, and manure as well as a mixture of top soil, sand and horse manure).
These were a one time expense, just as the lumber for the raised beds and the fencing are. Soon I will plant a cover crop to create green manure and build soil and by next season our home grown compost and chicken manure will be ready to add to the garden. We will also be expanding the irrigation system and adding more water barrels as well as a rainwater capture system.