
Join me while I make a new batch of sourdough starter. (I will be updating this post daily throughout the process.)
It’s very simple, although it takes 5-7 days to develop. But it’s well worth the wait when you get your first taste of this wonderfully flavored home-baked sour dough bread.
All you need is flour, water and a covered container that holds at least one quart.
SOURDOUGH STARTER DAY 1 :
1 CUP WHOLE WHEAT FLOUR (I use white whole wheat) 1/2 CUP COOL WATER

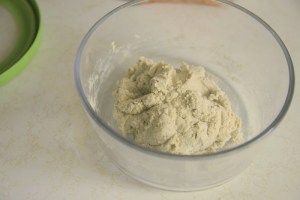
Combine ingredients in a non-reactive container about 1 quart.
Mix well incorporating all the flour.
Cover leave at room temperature for 24 hours.
DAY 2:
Discard half the starter (4 ounces, about 1/2 cup), and add to the remainder a scan
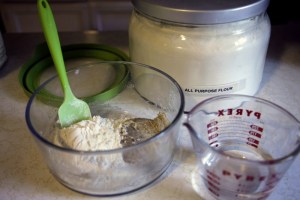
t 1 cup All-Purpose Flour,
and 1/2 cup cool water (if your house is warm); or lukewarm water (if it’s cold).
Cover and leave at

room temperature for 24 hours.
You should begin to see a difference in the “dough”. It will be lighter.
Day 3:
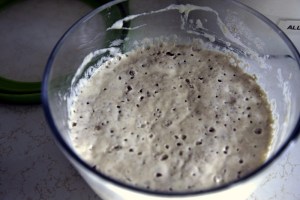
Today you’ll likely see some activity — bubbling; a fresh, fruity aroma, and some evidence of expansion.
It’s now time to begin two feedings daily, as evenly spaced as possible. For each feeding, weigh out 4 ounces starter, about a

generous half cup . Discard any remaining starter.
Add a scant 1 cup (4 ounces) All-Purpose Flour, and 1/2 cup water to the 4 ounces starter. Mix the starter, flour, and water, cover, and let the mixture rest at room temperature for approximately 12 hours before repeating.
Day 4: Weigh out 4 ounces starter, and discard any remaining starter. Repeat day 3.
If you hate throwing away the discarded starter as I do, here is a site with some great ideas/recipes for using it. Baking with Discarded Sour Dough Starter
Day 5: Weigh out 4 ounces starter, and discard any remaining starter. Repeat day 4. By the end of day 5, the starter should have at least doubled in volume.
You’ll see lots of bubbles and the starter should have a tangy aroma — pleasing but not overpowering.
If your starter hasn’t risen much and isn’t showing lots of bubbles, repeat discarding and feeding every 12 hours for as many dats as necessary — as long as it takes to create a vigorous starter. It should be bubbly and doubled in volumn.
Once the starter is ready, give it one last feeding. Discard all but 4 ounces (a generous 1/2 cup). Feed as usual. Let the starter rest at room temperature for 6 to 8 hours; it should be active, with bubbles breaking the surface. Remove however much starter you need for your recipe — typically no more than 8 ounces, about 1 cup. If your recipe calls for more than 1 cup of starter, give it a couple of feedings without discarding, until you’ve made enough for your recipe plus 4 ounces to keep and feed again.
Transfer the remaining 4 ounces of starter to its permanent home: a crock, jar, or whatever you’d like to store it in long-term. Feed this reserved starter with 1 cup of flour and 1/2 cup water, and let it rest at room temperature for several hours, to get going, before covering it.
If you’re storing starter in a screw-top jar, screw the top on loosely rather than airtight.
Store starter in the refrigerator, and feed it regularly as we’ve been doing once a week.
You can dry out your starter and use it later when you have more time for it. This would come in handy for times such as going away on vacation or moving.
I haven’t tried drying it yet, but it seems like it may be a good way to store the “discard” rather than throwing it all away.
There are a few You-Tube videos on drying the starter.
I will be using this recipe from NutmegNanny to make my no-yeast added sourdough bread.
Day 7: Today I am assembling my bread dough which may need to rise overnight in the fridge. I plan to make two loaves, one using only starter, the other adding a small amount of yeast.
Day 8: Baking day! So good.


Oh! a progressive post – that’s very interesting. My sourdough mother got ruined in the move and I am yet to start another.
LikeLike
Thanks for inviting me Kathleen (my sister’s name also). It is a very comforting site.
LikeLike
I’m sorry….better get on the stick and update my “cjs corner” As you have noticed, I am really about keeping life simple and natural. Educating consumers on healthier life choices! Keep those posts coming, an oasis in this insanity!
LikeLike
I would love to know about sourdough starter!
LikeLike